

Fitting a chandelier is a challenging and rewarding endeavor. It’s safer and much easier when you follow certain best practices in chandelier installation.
In this article, we’ll discuss how to fit a chandelier onto a standard wood-joist ceiling.
Later, you’ll also learn how to attach a chandelier to unique structures like tents, sloped ceilings, and concrete.
Step 1: First things first
The first thing to do is to determine the exact spot where you want your chandelier to hang.

Once you’ve decided, the next thing to do is to measure the floor-to-ceiling height.
As a rule of thumb, you must have at least three inches of chain length for every one foot of floor-to-ceiling height.
That means a chandelier to hang on a 10-foot ceiling must have at least 30 inches of chain.
(NOTE: If your chandelier will hang above a dining table, measure from the top of the table surface to the ceiling surface instead.)
Once you’ve made your measurements, it’s time to buy your chandelier if you haven’t already.
Some chandeliers have adjustable chain lengths, which will make your job a little easier down the line.
Step 2: Prepping for the installation
Now that your chandelier is ready, prep for the installation by having your tools ready. You’ll want to have the following handy:
- Screwdrivers (flathead and Phillips)
- Needle-nose plier
- Wire cutter
- Wire connectors
- Wire stripper
- Wire tester
- Electrical tape
- Step ladder (one or two, 6’ to 8’)
- Power drill and drill bits
- Steel measuring tape
You’ll also want an assistant with you—preferably strong but at least helpful enough to hand you the right tools while you’re climbing the ladder.
Once you’re ready to start the installation, unpack your chandelier.

Check it for any damage that might necessitate a replacement. Place it somewhere safe near the mounting site while you get the spot on the ceiling ready for it.
Step 3: Turn off the power
Safety comes first! Turning off the power ensures you don’t get shocked while handling electrical wiring while installing your chandelier. Here’s how to do it:
- Cut the power at the circuit breaker. Head to your home’s main circuit breaker panel. It is a large metal box with switches or fuses controlling power to different areas of your home. Also called the “electrical panel board,” the circuit breaker panel is often in the basement, garage, or utility room.
- Look for the circuit controlling the power and lighting for the room where you install the chandelier.
- Flip the switch to the “off” position or unscrew the fuse.
- If your circuits aren’t labeled (We’re not judging), you’ll have to test them one by one – flip switches until the light you’re about to replace turns off. That’s when you know you’ve found the right circuit.
- Double-check that the power is off. Flip the room’s light switch on and off a few times. If the light doesn’t turn on, you know you did it right. (NOTE: If no light fixture is currently installed, use a non-contact voltage tester to check the wires. It will tell you if electricity is still flowing.)
- Let everyone know. For extra safety, tape a note to the circuit box warning others not to turn the power back on while you’re working.
Step 4: Detach the old fixture
Now that the power is off, it’s time to remove the existing light fixture. You’ll need a sturdy stepladder or two, a screwdriver or wrench, and – if possible – an assistant. Here’s how to go about it:

Support the old fixture before unscrewing it
- Climb onto the stepladder and locate the screws, lock nuts, or fasteners holding the old light fixture to the ceiling.
- If the fixture is large or heavy, have your assistant hold it steady while you unscrew it.
- Never let the light fixture hang by the wires alone. Doing so can cause it to fall or damage the wiring inside the ceiling box.
Detach the old fixture from the ceiling
- Slowly unscrew the fasteners one by one. Again, if the light fixture is heavy, ask your assistant for help.
- Once free, gently lower the fixture and rest it on a secure surface. Do not pull on the wires just yet.
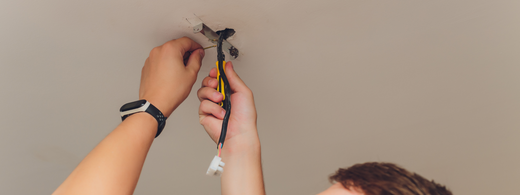
Inspect and note the wiring
Before disconnecting the wires, look at how they’re connected. Most light fixtures will have two or more wires:
- A black wire (the “hot wire”) that conducts the current.
- A white wire (the “neutral wire”).
- Sometimes, a green or bare wire (the “ground wire”).
If you’re unsure about the wiring setup, take photos to reference later.
If the wires look frayed or damaged, you’ll need to clean them up:
- Use a wire cutter to trim off the damaged ends.
- Using a wire stripper, remove about a half-inch of insulation from the wire to ensure a clean, safe connection for the new chandelier.
Test the wires for safety
- Use a voltage meter to ensure no electricity is flowing through the wires. If the tester lights up or beeps, double-check your circuit breaker to ensure the power is off. Remember, safety comes first!
Disconnect the wiring
- Unscrew the plastic wire connectors (“wire nuts”) by twisting them counterclockwise.
- Carefully separate the old fixture wires from the ceiling wires.
Remove the mounting hardware
- The old light fixture is usually attached to a mounting bracket or a junction box secured to the ceiling. Unscrew and remove the bracket or box with a screwdriver or wrench.
- If there’s a metal brace across the ceiling hole, use a close-quarter hacksaw to cut it in half, then pull the pieces out.
Once you’ve cleared the mounting area and ensured the wires are safe to work with, you’re ready for the next step:
Step 5: Install the brace for the new chandelier
Before hanging your new chandelier, confirm the ceiling support can handle its weight. Here’s how to make sure everything is secure:
Check the existing mounting box
- Most ceiling mounting electrical boxes are rated to hold up to 50 pounds (22.7 kg). Check the existing box to confirm its weight capacity.
- If your new chandelier weighs less than this limit, you can skip ahead to Step 6. If not (or if you’re unsure), follow the steps below to install a sturdier brace.
If the fixture is between ceiling joists, use a fan brace
- Purchase a fan brace rated for your chandelier’s weight and more. Many fan braces can support up to 150 pounds (68 kg).
- Insert the fan brace through the ceiling hole and rest it on top of the ceiling, across the opening, perpendicular to the nearest ceiling joists.
- Rotate the bar with your fingers to extend its arms until both ends firmly contact the wooden joists. The spiked ends should dig into the wood for a firm hold.
- Tighten the brace bar using a wrench, but don’t overtighten. Once it no longer moves, it’s secure.
- Place the mounting bracket (it comes with the fan brace) on top of the brace, aligning the holes. Slot the new mounting box onto the bolts and secure it by fastening the nuts.
Use a pancake box if the fixture is directly under a ceiling joist
- Purchase a heavy-duty pancake-style junction box. These are round metal electrical boxes designed for heavier light fixtures.
- Position the pancake box against the ceiling joist and secure it with the high-capacity screws provided with it. Standard screws are not strong enough and will cause your new chandelier to fall.
- Before fully fastening the box, ensure the ceiling wires are pulled through the hole in the side of the box so they’re accessible later.
Next, double-check the stability. Give the mounting box or fan brace a firm tug to ensure it’s secure. If it doesn’t budge, you’re ready to move to the next step.
Step 6: Install the chandelier
Now that your mounting hardware is in place, it’s time to hang your new chandelier. Follow these steps to ensure everything is set up properly before wiring:

Assemble the chandelier base
- Put together all chandelier parts according to the manufacturer’s instructions, except for the canopy (the decorative plate covering the ceiling box).
- Do not install the light bulbs yet. For now, the chandelier will be lighter and easier to handle without them.
Shorten the chain if needed
- You may have decided how low you want your chandelier to hang by now, but here are some guidelines to double-check:
- Over dining tables, the chandelier base should be at least 30 inches (76 cm) above the table surface.
- In walkways or foyers, the bottom of the chandelier must hang at least 7 feet (2.13 meters) above the floor to keep it out of the way.
- To shorten the chain, use heavy pliers to open one link at the desired length. Remove the excess links and reattach the open link to the chandelier.
Install the mounting strip
- Secure the mounting strip (a small metal bar with screw holes) to the ceiling’s junction box using screws that came with your chandelier or the box.
- Tighten the screws to ensure a snug, secure connection.
Thread the chandelier wires
- Carefully thread the chandelier wires through the following components in this order:
- Each section of the chandelier.
- The chain links (to keep wires tidy). You don’t need to thread them through every link—once near the bottom, middle, and top of the chain is enough.
- The metal canopy (the decorative ceiling plate).
- The chain holder at the top of the chain.
- The thin metal nipple that connects the chandelier to the mounting bracket.
- Ensure the wires extend fully through the top for easy access when wiring.
Note: If your chandelier model has a down-rod or cord-style hanging mechanism with enclosed wires, you can skip this “threading” step.
Hang the chandelier
- Have your assistant hold the chandelier steady as you hang it.
- Attach the chain or hanging mechanism securely to the mounting strip or bracket.
- Double-check that the chain length is correct. Adjust if necessary.
Position the canopy
- Attach the canopy loosely to the mounting bracket to cover the ceiling box. Later, unscrew it to access the wires for the next step..
- At this point, your chandelier should be securely in place and ready for wiring. After you ensure it’s at the correct height and looks level, proceed to the next step:
Step 7: Wire the chandelier
- Follow these steps carefully to ensure a safe and functional installation:
Prepare the chandelier wires
- Stretch the chandelier’s wires up to the ceiling box. Leave about a foot of extra wire to give yourself some wiggle room. Once you're satisfied, use wire cutters to trim any excess length.
- Thread the wires through the center hole in the canopy and up to the ceiling box. Then, pull them back down through the mounting bracket to make connections easier.
- Use a wire stripper to remove a half-inch of insulation from the ends of the chandelier wires. This will expose the bare wires for connection.
Connect the ground wires
- Find the bare copper wires from both the chandelier and the ceiling box. These wires act as the ground connection for safety.
- Wrap both worse around the green grounding screw on the junction box so they are in firm contact with each other. Tighten the screw securely.
Join the neutral wires
- Find the chandelier’s neutral wire. It typically has a ridge, groove, or lettering on its insulation.
- Place the bare end of the chandelier’s neutral wire next to the white ceiling wire (neutral) and twist them together. Secure the connection with a plastic wire connector.
- If the ceiling wires aren’t colour-coded, refer to the photos you took earlier or consult the chandelier’s instruction manual to find the neutral wire.
Connect the hot wires
- Find the chandelier’s hot wire, which is usually unmarked, and pair it with the black ceiling wire (hot).
- Hold the bare ends together and twist them tightly. Secure them with a wire connector.
Important: Pair like wires together – hot with hot, neutral with neutral – to avoid electrical issues like blown fuses. If your chandelier has a ground wire but the ceiling does not, leave the chandelier ground wire untouched and safely capped with a wire connector.
Secure the chandelier in place
- Once all the wires are connected, carefully tuck them into the ceiling box to keep them out of sight.
- Slide the chandelier canopy back up to the ceiling and secure it to the mounting bracket. Twist or screw it into place so it sits flush against the ceiling, covering the junction box.
- Tighten any bolts or lock nuts to firmly attach the chandelier.
Lastly, test the chandelier. Install the light bulbs, turn the power back on at the circuit breaker, and flip the switch.

With your new chandelier wired, mounted, and tested, your installation is complete – now it’s time to step back and enjoy your new lighting centrepiece.
If the chandelier doesn’t turn on, switch the power back off and check your connections. You may need to recheck the wiring or consult a qualified electrician if you’re unsure.
Special cases: Installing chandeliers in unique locations
Hanging a chandelier in a tent
Chandeliers can look elegant in marquee tents, but they must be properly supported:
- Only attempt this in tents with upright steel supports.
- Create a crossbar between two side supports to act as the hanging point. Ensure it is secure and stable.
- Hang the chandelier from the crossbar using the steps outlined earlier in this article.
- For power, connect the chandelier to a main power line or use a battery-powered option designed for temporary setups.
Hanging a chandelier from a concrete ceiling
Concrete ceilings require specific tools and materials to secure a new chandelier:
- Mark and drill holes into the concrete where the chandelier will hang. Align these holes with the mounting bracket.
- Insert concrete anchors into the drilled holes and gently tap them into place with a rubber mallet.
- Attach the mounting bracket to the anchors using retaining screws.
- Test-hang the chandelier to check stability and adjust chain length as needed.
- Run the power lines, connect them securely, and test the chandelier.
Hanging a chandelier on a sloped ceiling
Sloped ceilings require additional support to ensure the chandelier hangs level:
Option #1: Install a beam spanning the length of the ceiling and hang the chandelier from the beam.
Option #2: Attach perpendicular supports to the ceiling joists and mount a crossbar between them. This creates a stable hanging point for the chandelier.
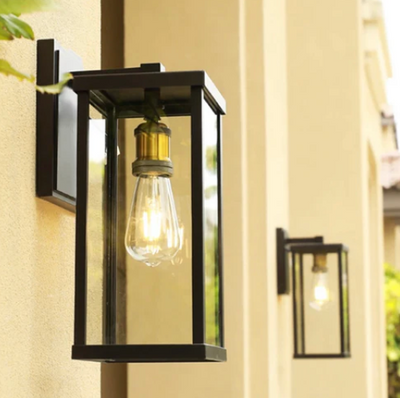
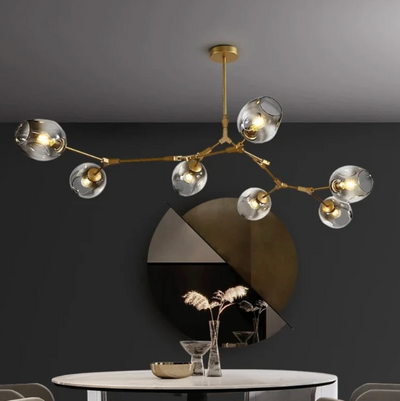
View chandeliers
At Light Trend, we offer a wide range of stunning chandeliers, including bespoke options. Explore our chandeliers and staircase chandeliers to find the perfect piece for your home.
Our expert team is always available to help you select the ideal design to suit your space.

Leave a comment
All comments are moderated before being published.
This site is protected by hCaptcha and the hCaptcha Privacy Policy and Terms of Service apply.